
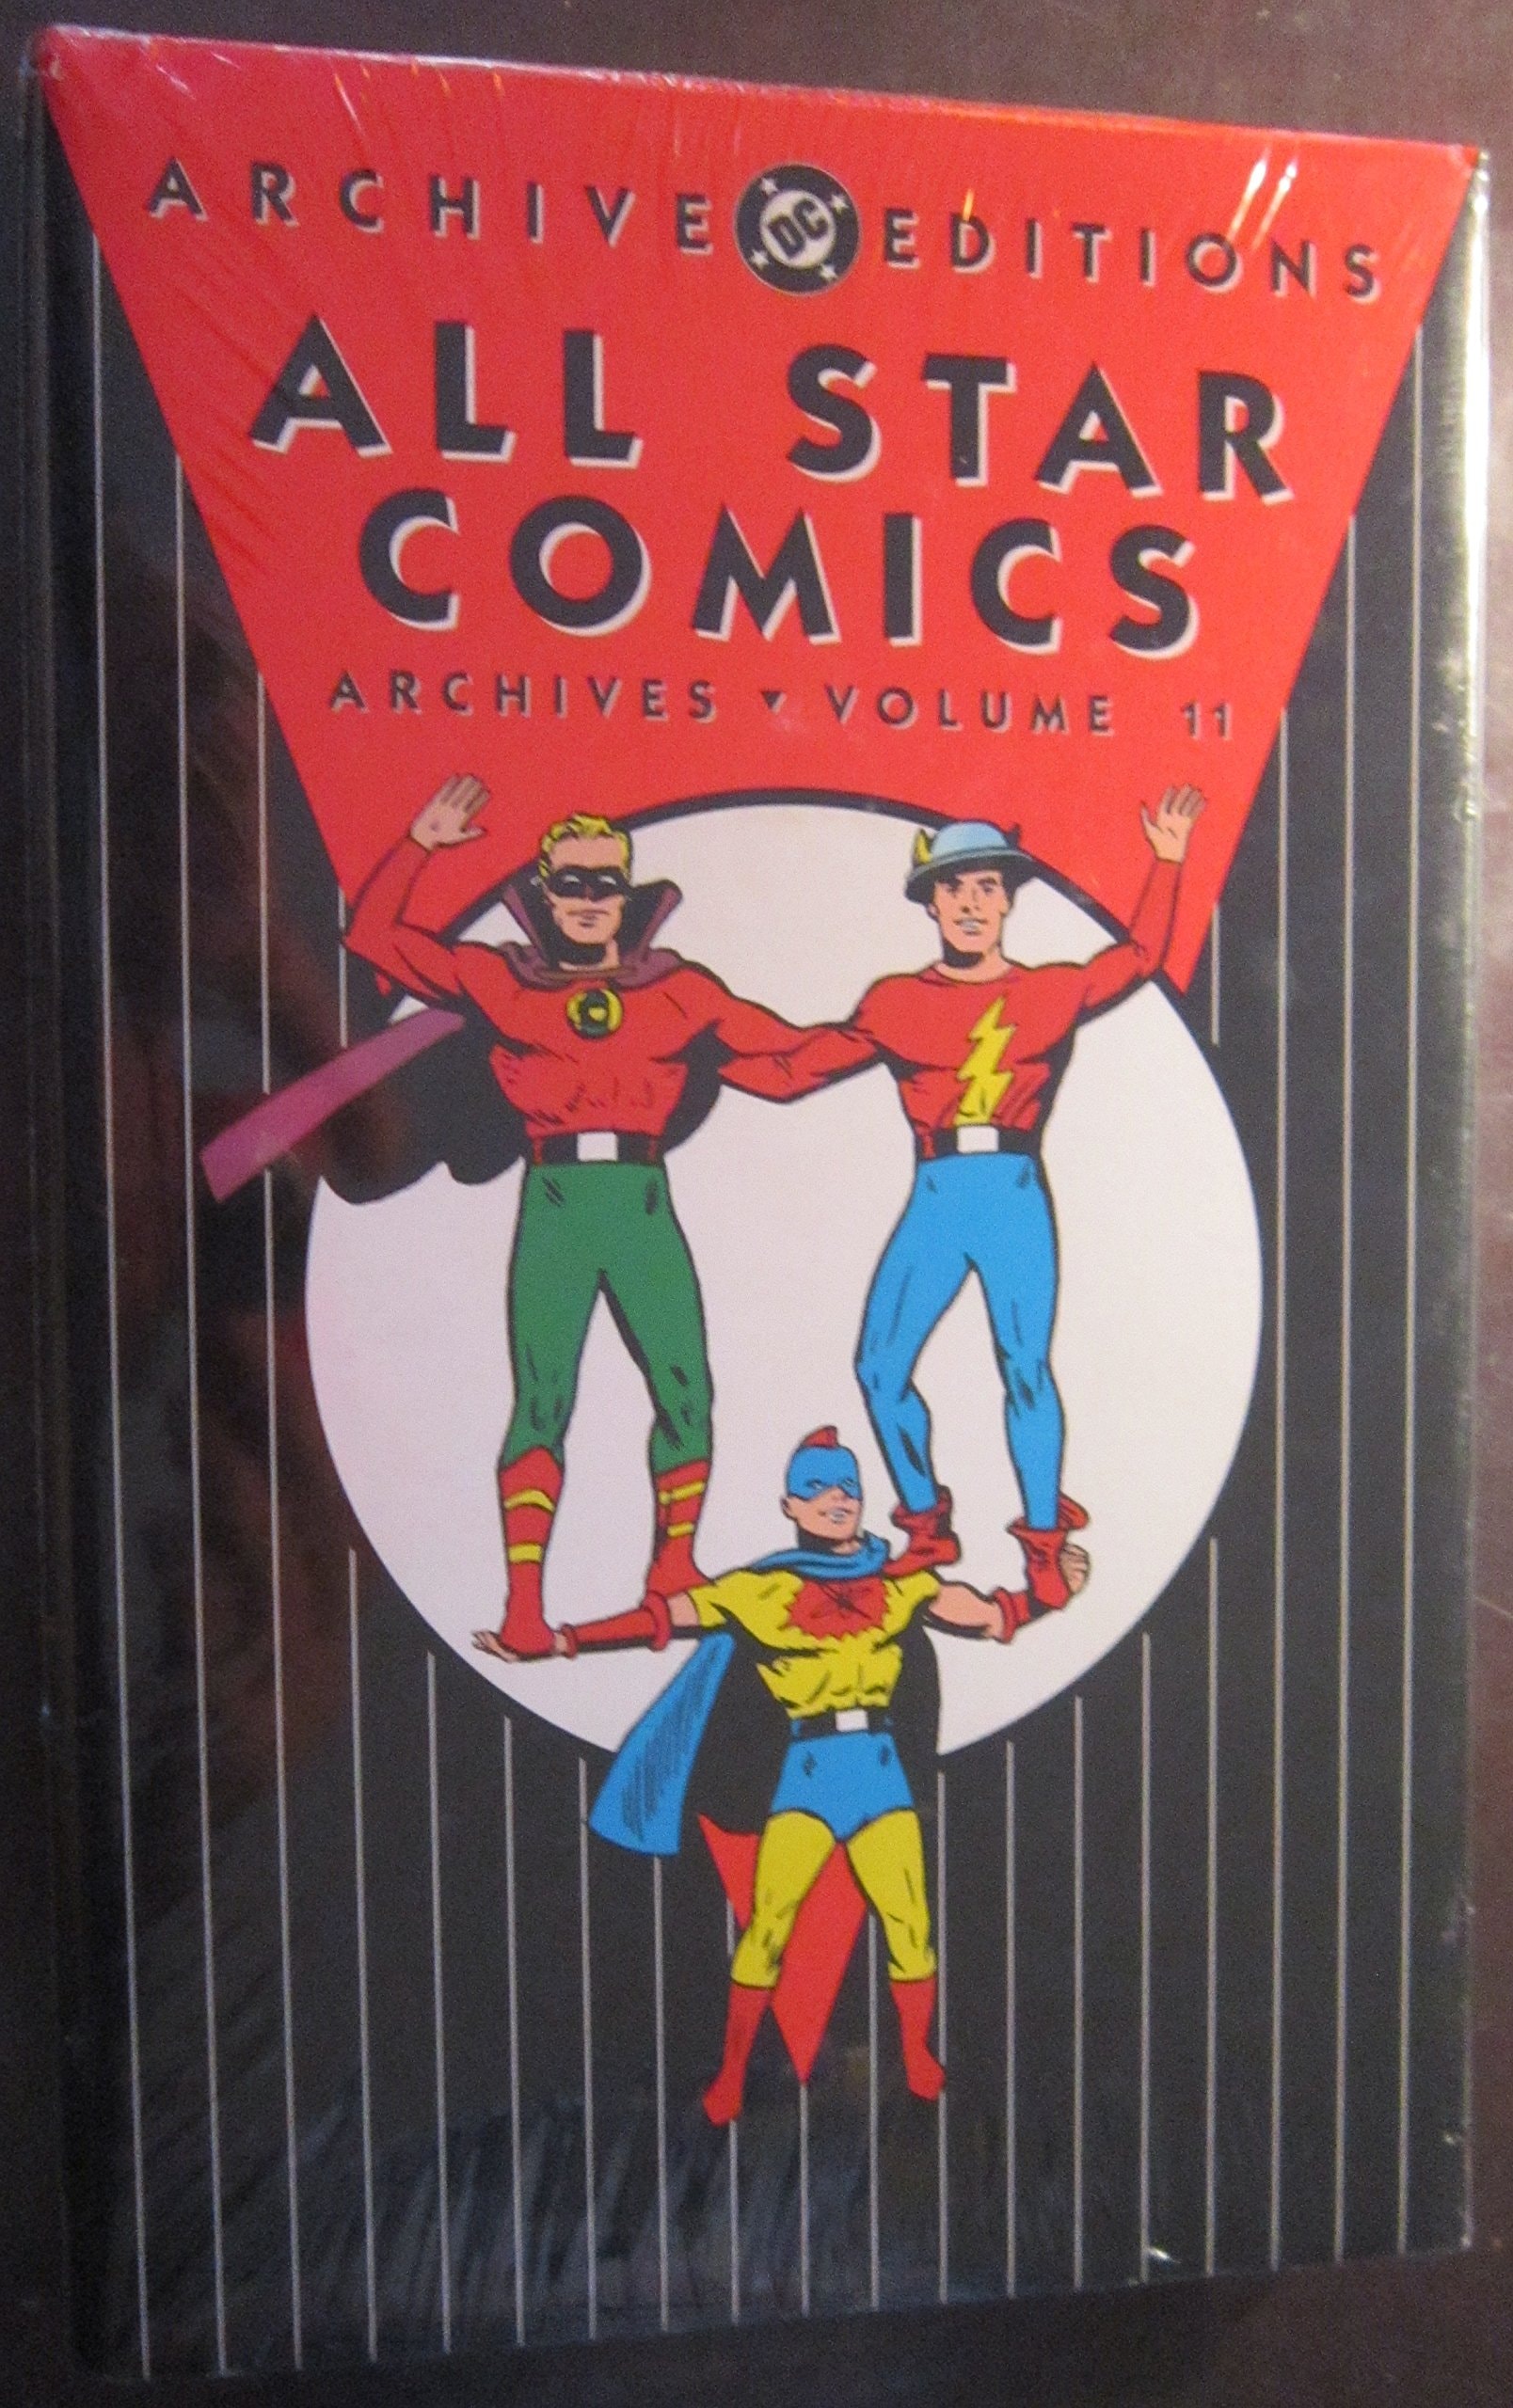
All Star Comics Archives #11
☆ Be the first to review + Add to your collection — Join freeThis volume collects the final issues of the Golden Age All Star Comics, reprinting issues #57-74 from the early 1950s. It features the Justice Society of America in their last pre-Crisis adventures, including crossovers with the Western hero Johnny Thunder and the debut of the original Star-Spangled Kid. The Archive Edition series preserves these classic stories in hardcover with restored coloring and original lettering.
"The Prophecy of Peril! [Part I]" kicks off a high-stakes showdown in All Star Comics Archives #11, a 2005 collection spotlighting a pivotal moment in the JSA’s history. Written by John Broome and illustrated by Frank Giacoia, this story sees Knelo unleash a dire ultimatum with the Triple-Z Bomb, forcing Earth’s leaders into a tense standoff—only for Black Canary to rally them against surrender as the JSA prepares a daring countermove. The cover, by Arthur Peddy and Bernard Sachs, captures the moment of deception and danger, setting the stage for a mission that will send the Chameleons into exile and the JSA hurtling through time.
In "The Prophecy of Peril! [Part I]," the Justice Society of America gathers at Midwestern University for a celebration, but the Flash is absent—bound by a decade-old promise to revisit a prophecy made with seven classmates and their professor. When Paul Turnbull refuses to join the reflection, burns his prediction, and exits abruptly, the JSA uses ultraviolet light to uncover a shocking truth: his prophecy foretold a future as the criminal Mr. Alpha.
In "The Prophecy of Peril! Part II," Hawkman and the Atom race to Gulfport to track down Mr. Alpha, suspecting he's Paul Turnbull, just as a levee breach unleashes chaos. Meanwhile, Dr. Mid-Nite and Black Canary follow a trail of weather-based clues in Florida, only to find themselves caught in a hurricane-fueled casino heist—and a deadly trap.
In "The Prophecy of Peril! Part III," Flash and Wonder Woman race through a blackout-ridden city after discovering Mr. Alpha’s sabotage at the zoo, leading them to a heist at city hall where the villain strikes again. Meanwhile, G.L. battles a trap of magnetic oil at Sword Auto Company—until Paul Turnbull’s unexpected arrival reunites the JSA and delivers a crucial clue that could unravel Alpha’s true identity.
In "Invaders from the World Below! [Part I]" from All Star Comics Archives #11, the Justice Society of America investigates strange phenomena in Civic City, led to a startling meeting with scientist Crillon, who warns of a hidden race of Diamond People beneath the Earth’s surface. When Crillon and a mysterious figure named Mr. Exnam vanish mid-presentation, the JSA uncovers clues in his notebook that push them to investigate the Bottomless Lake and Old Reliable Geyser before it’s too late.
In "Invaders from the World Below! Part II," Flash, Wonder Woman, and Black Canary race to the abandoned World's Fair grounds after Crillon's clues point to a Diamond People attack. When a sudden volcanic eruption tears through a playground, the trio fights to contain the lava—only to be blinded by a gem ray and plunged into the smoking crater. Meanwhile, at Bottomless Lake, G.L. and the Atom uncover a chilling mystery as the lake freezes over, leading to a desperate struggle against the same alien force.
In "Invaders from the World Below! Part III," Dr. Mid-Nite and Hawkman race to a secret government facility only to find it under siege by the Diamond Men. As they disable the attackers, one escapes with the Gem Ray, blinding the heroes just as they narrowly avoid a deadly wire. Back at headquarters, the JSA pieces together their separate escapes—until a shocking arrival reveals the truth behind the Diamond People, and Flash uncovers a crucial weakness in their sound-based destruction.
In "The Secret Conquest of the Earth! [Part I]," the Justice Society of America is drawn into a mystery that begins in Africa, where Professor Matthews reveals the tale of four ancient kings from a long-lost super-race. After discovering the kings imprisoned in a glass case, the JSA is overpowered by their psychic commands, plunging them into a year-long slumber—only to awaken to a world in chaos, torn apart by four new warlords.
In "The Secret Conquest of the Earth! Part II," Hawkman and Wonder Woman race to stop Mr. Prince from manipulating a South American leader into declaring war, only to uncover a deeper conspiracy involving ancient minds and manipulated nations. As the Blue Shirts fall under the spell of a forgotten king, the heroes must expose the truth before the ancient villain’s influence spreads further—while Monarch’s forces erupt in chaos across Europe, their downfall just moments from unfolding.
In "The Secret Conquest of the Earth! Part III," the Masked One's schemes grow bolder as his Cavaliers plot war, only to be outmaneuvered by the Atom and Dr. Mid-Nite—yet their victory is fleeting when he vanishes without a trace. Meanwhile, a mysterious mental assault targets U.S. citizens, pressuring Congress to declare war, sending G.L. to Washington to confront Mr. Crown and his Swordmen, who also slip away into nothingness. With the JSA now joined by Professor Matthews, the team races to Africa for a final showdown with the Four Kings, determined to stop their deadly plan before it's too late.
In "The Gun That Dropped Through Time! [Part I]," the All-Star Comics Archives #11 delivers a tight, time-sensitive mystery as the JSA investigates the murder of inventor Dr. Swanley at the National Society of Inventors Show. With a missing weapon and a framed suspect, the heroes must unravel the secrets of Swanley’s enigmatic time chute before a wrongful execution takes place—leaving only two hours to piece together the past before it vanishes.
In "The Gun That Dropped Through Time! [Part II]," Flash and Black Canary race through the Time Chute to the 14th Century, where they must outwit the Khan to claim a mysterious gun—only for it to vanish mid-battle. Meanwhile, Wonder Woman and Dr. Mid-Nite land in 5th Century Europe, captured by Attila the Hun, who holds the same weapon, and must use cunning and combat to seize it—before it slips away again.
In "The Gun That Dropped Through Time! Part III," Hawkman and the Atom land in ancient Rome in 71 B.C., where they’re drawn into a gladiatorial spectacle centered around a mysterious new weapon. As the Atom claims the gun amid a clash with the arena’s fighters, the duo barely escape—only to find the weapon vanishes. Later, G.L. arrives in 9638 B.C., where he encounters the Queen of Atlantis, who reveals the gun’s deadly history, and when a sudden earthquake strikes, he manages to hold onto it—this time, with his ring keeping it from disappearing again.
In "The Gun That Dropped Through Time! Part IV," the Justice Society of America faces a deadly twist when their mission to return the Time Chute leads them to uncover a shocking truth: Pomar is behind Swanley's murder. With time running out and a sinister new ray weapon threatening their resolve, Dr. Mid-Nite devises a clever countermove that turns the weapon’s power against its wielder.
In "Circus of a Thousand Thrills [Part I]," the Justice Society of America finds themselves at a crossroads—officially off the case—until Green Lantern suggests a break at the mysterious circus that’s just rolled into town. When the Civic City Police Chief warns of a string of nighttime crimes hitting cities where circuses have appeared, the JSA’s curiosity turns to suspicion, and the spotlight shifts from spectacle to investigation.
In "Circus of a Thousand Thrills! Part II," Hawkman races to protect the Pharaoh, a priceless oil painting, only to find it stolen by Felix the Great and two circus clowns—leading to a showdown that ends with the thief in custody, but a surprising twist when Hawkman spots Felix performing at the circus. Meanwhile, the Flash and the Atom guard Mrs. Rockmillion’s Pompeii Tiara, only to see it stolen by Frederick and his trained elephants—only to be stunned when Frederick appears in the same circus act later.
In "The Circus of a Thousand Thrills! Part III," Dr. Mid-Nite and Wonder Woman defend a priceless collection of electrum coins from Demon Dan, only to find him performing at the circus days later—unlocked and unharmed. Meanwhile, G.L. arrives at Alvin Marcey’s estate to protect the Harmonimac, thwarting Mr. Mechanico and Goliath, only to discover the duo also performing at the same circus. As the Green Gladiator and Black Canary watch in disbelief, the mystery of the circus’s strange magic begins to unfold.
In "The Man Who Conquered the Solar System! [Part I]," the JSA is stunned by a bizarre report from Texas oilman John Morrison, who claims to have seen a UFO and alien beings in the desert—only to find no evidence. When the team investigates the mysterious Professor Napier’s abandoned lab, they uncover a wire recording revealing his secret plan: a rocketship bound for Jupiter. With the Professor gone, the JSA takes up his mission, completing the vessel and launching into the unknown.
In "The Man Who Conquered the Solar System! Part II," the Justice Society of America races to Jovalus after a lightning-fast journey to Jupiter, where they rescue Miko from the Green Star people. With Black Canary and Dr. Mid-Nite guarding him, the team presses on through attacks by green fish men, only to discover that Bakeelu wields a weapon capable of splitting Earth in two—while Wonder Woman prepares a daring countermove.
In "The Man Who Conquered the Solar System! Part III," Hawkman and Wonder Woman press on after defeating the Green Heads, racing to Mars with the Flash’s warning that the Conqueror has fled there. Once landed, they face monstrous ape men before Green Lantern confronts the enemy directly—only to be tempted into joining him, as he sees his own kind already under the Conqueror’s control.
In "The Man Who Conquered the Solar System! Part IV," Bakeelu prepares to fire the disintegrator at Earth, but the JSA—freed from mind control by the Green Gladiator’s ring—rally to stop the weapon. As the beam unleashes, it destroys the Green Star instead, and with Miko capturing Bakeelu, the heroes race back to Earth aboard the rocketship.
In the 31st Century, New Modernia faces an unseen threat as the shape-shifting Chameleons disrupt society, prompting Professor Ellery to seek help from the past. With the city's safety at stake, he proposes a daring plan: using a Time-Bus to summon the Justice Society from the 20th Century, where they’ve already encountered one of the Chameleons and know their danger.
In "The Day the World Ended! Part II," the Justice Society of America arrives in the 31st Century to confront a devious Chameleon impersonating Professor Ellery, only to be trapped by a swarm of giant, murderous robots. With the real threat revealed, the JSA splits into teams to stop the Chameleon Chief’s plan to impersonate three key officials—Flash and Wonder Woman racing to City Hall, where a disguised Mayor Hoving steals the Great Seal and vanishes into the crowd.
In "The Day the World Ended! Part III," two scientists wield the terrifying Triple-Z Bomb, and as General Cadwell—secretly the Chameleon—orders them to bury it, the JSA scrambles to stop the threat. With G.L. and the Atom confronting the impostor general and battling guards, Hawkman, Dr. Mid-Nite, and Black Canary race to uncover the truth at Spaceships, Inc., where they find C. F. Tanner on the verge of boarding a Skyblaster—only to be ambushed by plant guards.
In "The Mystery of the Vanishing Detectives! [Part I]," four renowned detectives from around the world are summoned to Civic City for a unique demonstration of their methods—only to vanish mid-solution, leaving behind a single silver skeleton key. When urgent messages from their home nations demand their return, the JSA realizes a cunning criminal has orchestrated a grand theft of the world’s greatest minds, and they must race to uncover the truth before more vanish.
In "The Mystery of the Vanishing Detectives! Part II," Dr. Mid-Nite teams up with London’s Chief Inspector McReady after a bank vault is robbed and a silver skeleton key is left behind, leading to a chase through fog-drenched streets and a daring capture on a moving train. Meanwhile, the Flash joins forces with the Parisian Commissaire of the Surete when the gargoyles of Notre Dame begin vanishing, setting off a trap that uncovers a hidden treasure ring operating in the city’s underground clubs.
In "The Mystery of the Vanishing Detectives! Part III," Wonder Woman uses Turkish psychology to track down a fake Emir who stole 300 pounds of gold, leaving only a silver skeleton key behind—leading her to a hidden submarine and a beachside bust. Meanwhile, in Honolulu, Green Lantern employs Harry Wan’s unorthodox tactics to recover a stolen celebrity-signed $100,000 bill from millionaire J. Fred Wallis, turning the thief’s own scheme against him.
In "The Mystery of the Vanishing Detectives! Part IV," the Justice Society of America races to solve a baffling case when a series of clues lead them from a hidden cellar beneath the Civic City Arena to a trance-bound group of missing detectives in a mysterious mansion. As Black Canary, Hawkman, and Atom piece together the trail, an unexpected reveal on a screen exposes the Key’s true identity—only for the villain to make a desperate escape, leaving the JSA to confront the aftermath.
ComicBooks.com Value
Find on ebay
Where to buy
Read it digitally
Sell my copy
Have this issue — or a whole collection? Get a fair offer from us, skip the marketplace fees and the hassle.
We Buy Collections ▸Full credits
Reprints
↩ Reprints All-Star Comics #50 (1949), All-Star Comics #51 (1950), All-Star Comics #52 (1950), All-Star Comics #53 (1950), All-Star Comics #54 (1950), All-Star Comics #55 (1950), All-Star Comics #56 (1950), All-Star Comics #57 (1951)
Reviews
Reader reviews
No reader reviews yet.