
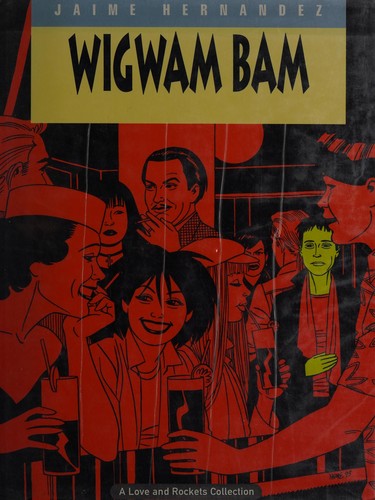
The Complete Love & Rockets #11
☆ Be the first to review + Add to your collection — Join freeThis eleventh volume of the Complete Love & Rockets series collects issues #41–48 of the original comic, continuing the intertwined lives of the characters in the fictional Central American town of Palomar. Gilbert Hernandez focuses on the fallout from the previous storylines, delving deeper into the personal dramas and magical realist elements that define the series. The collection features the titular 'Wigwam Bam' storyline, a key chapter in the ongoing saga of the Hernandez brothers' acclaimed independent comic.
In "Wig Wam Bam (part one)," Maggie feels uneasy at an artsy party hosted by Pat in her East Coast home, where old tensions and strange dynamics simmer beneath the surface. On the way back to Mary's apartment, she and Hopey discover Mary has thrown out their belongings, deepening the sense of displacement. A flashback reveals a wilder, younger Maggie being pranked by Terry, who takes her to meet Lois—a bold, sexually charged party host and a fan of one of Maggie’s relatives—during their punk days.
In "WWB P3," Ray Dominguez finds himself adrift after being locked out of his apartment, eventually handing it over to Danita Lincoln—only to see their tentative new start tested by whispers of Maggie’s return. Meanwhile, Izzy [Isabel Ortiz Ruebens] quietly arranges photos of Hopey [Esperanza Leticia Glass] on milk cartons, her actions a quiet mystery amid the shifting dynamics of the group. Flashbacks reveal a younger Daffy [Daphne Matsumoto] left stranded in Lois’s apartment, a moment of awkward tension that echoes through time.
In "Wig Wam Bam (part four)," Joey Glass confronts the growing tension over the mysterious images of Hopey on milk cartons, finally tracking down the truth to Izzy Ortiz Ruebens—only to find her gone. Meanwhile, Izzy, recently discharged from a psychiatric clinic, returns home and quietly dismantles the dozens of photos of Hopey she'd pinned to her walls. On the East Coast, Maya learns from friends at a bar that Hopey has been staying with Jewel Tucker all along, sparking new questions about where she’s been and who’s been watching over her.
In "Wig Wam Bam (part five)," Doyle's breakup with Lily leaves him vulnerable, and Nami seizes the moment—slipping into his temporary refuge while he's away, leading to an intimate, unexpected connection. Meanwhile, Danita is sent back to her mother’s after the sudden closure of Bumper’s club, David shares a cryptic keepsake with the Hoppers kids, and Hopey wrestles with whether to stay at Nan Tucker’s, swayed by Jewel’s quiet insistence that she’s not ready to leave.
In "Wig Wam Bam (part six)," Nan Tucker’s arrival stirs quiet tension as she and Hopey share hesitant conversations that reveal unexpected layers. Izzy’s visits to Penny and Marco awaken old feelings, her fixation on Maggie and Hopey flaring anew—while Hopey grapples with the unsettling revelation about Nan’s secret fascination with women dressed as little girls.
In "Wig Wam Bam (part seven)," Izzy returns to the East Coast, reconnecting with Terry and her old friend Barb, whose new hairstyle stirs up memories of Maggie. As the conversation turns to Hopey’s face on milk cartons, Izzy’s long-held obsession begins to unravel, leading her to confront Hopey at a bar—only to clash over Maggie’s legacy. Meanwhile, Hopey secretly watches Nan indulge in a private fantasy, and Doyle, adrift after his relationships fade and Bumper’s club closes, departs town for good.
In "Wig Wam Bam 8," a group of women gather at Nan's house for a surreal, fetish-driven gathering that blurs the lines between performance and identity. As tensions rise, Jenny's bold behavior sparks a violent outburst from Mrs. Watkins, leading to a hospitalization that sends shockwaves through the circle. Meanwhile, Izzy uncovers a poignant memory from Maggie’s past through her diary, while Hopey returns to Tex’s home only to be attacked by two men sent by Nan—leaving both injured and the fragile peace shattered.
Joey Glass tries to ease his mother’s worries by claiming he was the one who put Hopey’s face on the milk cartons, a lie meant to comfort her. Meanwhile, Janet Polo encounters a punk band called the Hopey Monsters, who confess they staged the missing persons report as a joke—leading to the very publicity that now haunts Hopey’s memory.
ComicBooks.com Value
Find on ebay
Where to buy
Read it digitally
Sell my copy
Have this issue — or a whole collection? Get a fair offer from us, skip the marketplace fees and the hassle.
We Buy Collections ▸Full credits
Reprints
↩ Reprints Love and Rockets #33 (1990), Love and Rockets #34 (1990), Love and Rockets #35 (1991), Love and Rockets #36 (1991), Love and Rockets #37 (1992), Love and Rockets #38 (1992), Love and Rockets #39 (1992), Love and Rockets #42 (1993)
Reprinted in Love & Rockets #[4] (1995), Love and Rockets: The Covers #[nn] (2013), Love and Rockets #10
Variants (1)
Reviews
Reader reviews
No reader reviews yet.