
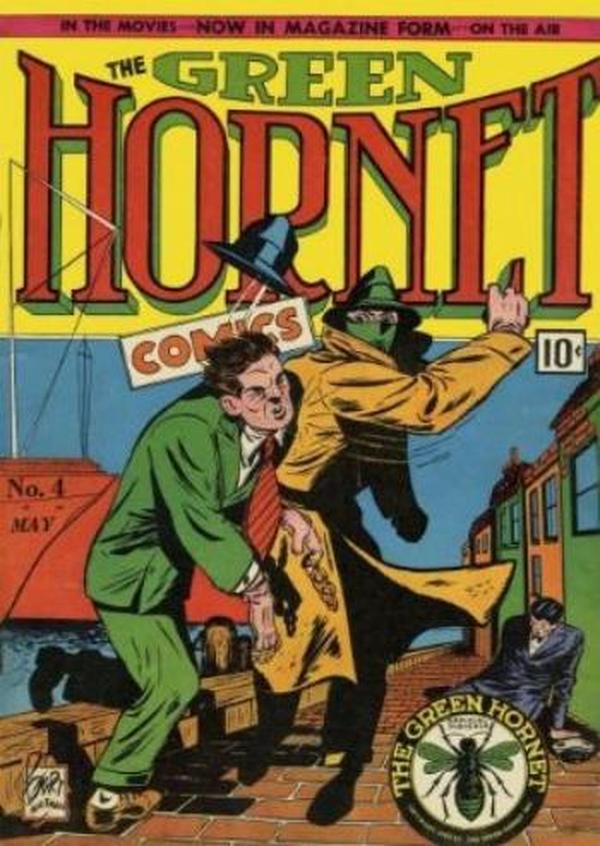
Green Hornet Comics #4
☆ Be the first to review + Add to your collection — Join freeIn "Jake Saco and the Broken Bridge," the Green Hornet takes on a shadowy Tong war gripping the city's oriental district, uncovering a dangerous secret: rival factions each hold half of a sacred tablet that points to a hidden treasure meant to aid China's rebuilding. Written by Fran Striker and brought to life with sharp, dynamic art by Bert Whitman Associates, this 1941 adventure blends espionage, cultural intrigue, and the Hornet’s relentless pursuit of justice—complete with a striking cover by Bert Whitman.
In "Jake Saco and the Broken Bridge," the Green Hornet confronts a devastating moral reckoning when he uncovers that the bridge's collapse—claiming innocent lives—was the result of contractor Jake Saco’s cost-cutting betrayal. With justice at stake and lives lost, the Hornet must decide how far the law should go in holding a man accountable for his choices.
In "Tong War," Britt Reid, the Green Hornet, dives into the shadowy underworld of an oriental city district torn apart by a violent Tong war. When he uncovers that rival gangs are each guarding half of a sacred tablet tied to a hidden treasure meant to help rebuild China, he must navigate a web of deception before the conflict spirals beyond control.
In "Little Marty," the Green Hornet tracks a crime syndicate boss responsible for shooting and kidnapping Mike Axford, a man investigating the murder of a low-level crook named Spud. With the stakes rising and a trail of violence unfolding, the Hornet must navigate a web of deceit to bring the culprit to justice.
In "Phantom Truck," the Green Hornet and Kato take on a shadowy menace when a mysterious, seemingly supernatural truck begins sabotaging a rival transportation company. With no clear trail and rumors of ghostly drivers, the duo must uncover the truth behind the phantom before the city's streets fall under its eerie control.
In "The Capture of the Green Hornet: Part 2," the Green Hornet narrowly escapes a deadly ambush by Axford, Lowry, and Moran, his injuries pushing him to the brink. Just as capture seems certain, Kato springs a clever distraction with a fake bomb, creating a diversion that buys the Hornet precious seconds to vanish into the shadows.
ComicBooks.com Value
Show all 15 grades ▾
This exact issue on ebay
Raw / ungraded ▾ $1.5–$12 5 listings
More listings for this title
Read it digitally
Sell my copy
Have this issue — or a whole collection? Get a fair offer from us, skip the marketplace fees and the hassle.
We Buy Collections ▸Cast · 3 characters
Full credits
Reprints
Reprinted in The Green Hornet: Golden Age Re-Mastered #5 (2010), The Green Hornet: Golden Age Re-Mastered #6 (2011), The Green Hornet: Golden Age Re-Mastered #7 (2011)
Key issues in Green Hornet Comics
Reviews
Reader reviews
No reader reviews yet.