
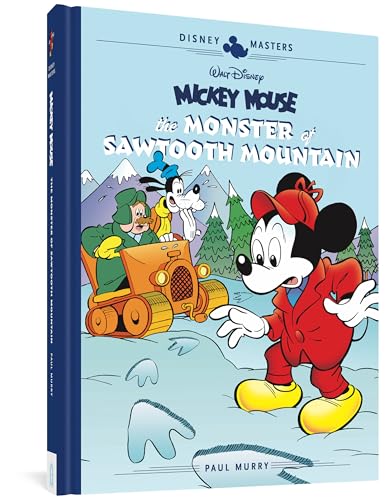
Disney Masters #21
☆ Be the first to review + Add to your collection — Join freeThis volume collects the complete 1950s newspaper adventure strips by legendary Disney artist Paul Murry, featuring Mickey Mouse, Goofy, and Pegleg Pete in the titular tale 'The Monster of Sawtooth Mountain' along with additional serials like 'The Mystery of the Phantom Blimp' and 'The Lost City of the Incas.' Part of Fantagraphics' acclaimed Disney Masters series, it showcases Murry's dynamic cartooning and classic storytelling from the golden age of Disney comics.
In "The Fantastic Fog [Chapter One]," Mickey and Goofy venture into the mysterious Valley of the Lost to solve a string of pineapple thefts, suspecting either the legendary Menehunes or ordinary crooks. As they paddle deeper, they're ambushed by boulders dropped by the plantation foreman George and a taxi driver, narrowly escaping death—only to be trapped by a sudden flood caused by storm-washed debris damming the valley. With the waters rising, they stumble upon something far stranger than they expected. Written by Carl Fallberg and illustrated by Paul Murry—whose dynamic art and inks bring the adventure to life, with colors by Digikore Studios and lettering by Murry—this issue features a striking cover by Paul Murry.
In "The Fantastic Fog [Chapter One]" from Disney Masters #21, Mickey and Goofy try to dodge Chief O'Hara for a well-earned break—only to be mistaken for fugitives by two shadowy figures who lure them into a strange, swirling fog bank. There, they’re drawn into a secretive scheme they don’t understand, forcing Mickey to play injured just to escape with their lives and no leads on who’s behind it. With the mystery deepening and the fog still thick, they race to warn the Chief—before the next move is made.
In "The Fantastic Fog [Chapter Two]" from Disney Masters #21, Mickey and Goofy dive into a baffling case when Gyro Gearloose’s fog-magnetizing invention becomes the center of a criminal scheme. As they track clues through the misty streets, they’re ambushed by The Skipper and Frutch—figures from the last chapter—only to learn the duo are actually undercover detectives themselves.
In "The Fantastic Fog [Chapter Three]," Mickey, trapped aboard a pirate vessel with Goofy and Gyro, must outwit the cunning Skipper and Frutch, who are using Gyro’s fog magnetizer to ambush passing ships. With the sea shrouded in mystery and danger, can Mickey turn the tide before the pirates’ scheme comes to full fog?
In "The Threat of the Stone-Eaters [Chapter One]," Mickey and Goofy answer a distress call from Professor Cramnoggin, setting off into the treacherous Andes to find the missing scientist Dr. Artifact. Along the way, they’re met by the enigmatic Slunk, who claims to be a friend of the missing man and offers to guide them—only to abandon them in a deadly snowstorm.
In "The Threat of the Stone-Eaters [Chapter Two]," Mickey and Goofy barely survive a treacherous descent down the icy mountain, using a frozen sleeping bag as a toboggan to outrun the cold. They stumble upon Dr. Artifact, held captive by the villainous Slunk and a group of Andes natives, who’ve uncovered a terrifying secret: a species of termites that devour stone—something Slunk intends to weaponize unless his demands are met.
In "The Threat of the Stone-Eaters [Chapter Three]" from Disney Masters #21, Mickey, Goofy, and Dr. Artifact flee the high mountain on llama-back, racing to warn the authorities about the stone-eating termites and Slunk’s sinister plans. As Slunk closes in on horseback, his metal container brimming with the creatures, the heroes are pursued by an angry band of natives—leaving the outcome hanging in the balance.
Mickey and Goofy roll into Sawtooth Valley on a snowy case, summoned by Chief O'Hara to look into reports of a mysterious monster haunting Frosty O'Hara’s winter resort hotel. With frosty peaks looming and rumors swirling, the duo sets out to uncover the truth behind the creature—before the whole season goes off the rails.
In "The Monster of Sawtooth Mountain [Chapter Two]" from Disney Masters #21, the sleepy town of Sawtooth Valley erupts into chaos when news of a mysterious monster draws crowds of tourists and reporters. With handyman Ben spreading the word that the creature is trapped in a box canyon, the townspeople—eager and wide-eyed—abandon their homes in a rush to catch a glimpse or track down the beast.
In "The Monster of Sawtooth Mountain [Chapter Three]," fear grips Sawtooth Valley as rumors of a creature terrorize the town, leaving it deserted and vulnerable. Black Pete, seizing the chaos, moves in to loot the empty streets—until Mickey, Goofy, and Frosty O'Hara begin piecing together the truth behind the scare.
In "Alaskan Adventure [Chapter One]" from Disney Masters #21, Mickey and Goofy head north for a fishing trip—only for Goofy to pack jungle gear based on his great-uncle Whopper O’Goof’s wild tales of Alaskan jungles, banana trees, and crocodiles. When Skulk and Tiny spot Goofy’s suspicious supplies, they’re reminded of Whopper’s legends and quietly trail the duo, only to be interrupted when Goofy’s fishing line pulls a carved crocodile head from the river. Before they can act, a native chief appears and demands Mickey and Goofy carry the totem pole to an unknown destination.
In "Alaskan Adventure [Chapter Two]" from Disney Masters #21, Mickey and Goofy are brought to a hidden tropical valley by the chief, their journey complicated by a mysterious totem pole and the looming threat of a volcanic river. With Skulk and Tiny watching from the shadows and the valley’s secrets under threat, the duo must find a way to escape before rising hot springs turn the sanctuary into a boiling trap.
In "Alaskan Adventure [Chapter Three]" from Disney Masters #21, Mickey, Goofy, and the chief uncover the truth behind the valley's flooding—Skulk and Tiny have built a dam upstream, threatening the entire region. With Tiny sent through the damaged tunnel to mark the gold mine’s location, the group faces a tense standoff as promises are made and a plan begins to unfold.
Mickey and Goofy swing into action on a Hawaiian pineapple plantation, chasing a string of mysterious thefts that leave behind only tiny footprints and a trail of tropical mischief. With whispers of the elusive Menehunes—legendary little men said to work under cover of night—the duo must uncover the truth behind the vanished fruit before the harvest is lost.
In "Pineapple Poachers [Chapter Two]," Mickey and Goofy venture into the Valley of the Lost aboard an outrigger canoe, chasing clues about the mysterious pineapple thefts—were they the work of the legendary Menehunes, or just clever crooks? As they navigate the treacherous waters, they’re ambushed by boulders dropped by the plantation foreman George and a taxi driver, narrowly escaping death before a sudden storm floods the valley, trapping them in rising waters and leading them straight into the presence of the very creatures they were hunting.
In "The Trail to Treasure," Goofy stumbles upon a mysterious stone with ancient glyphs in his garden, sparking a quest when Professor Seezal deciphers it as part of a hidden trail leading to a long-lost cache of statues. The journey takes them across unexpected terrain to a desolate island, where they must navigate both the landscape and an unlikely resident who’s not eager to share his sanctuary.
In "Mickey's Strange Mission [Chapter One]," Blackstone P. Percival, a refined and unexpectedly proper cousin to the notorious Black Pete, arrives in town with a surprising proposition: a fortune of fifty thousand dollars awaits Black Pete—if he agrees to abandon his criminal ways and go straight. The mission falls to Mickey Mouse, who must help guide the unlikely criminal toward redemption, all while navigating the absurdity of a scheme that’s equal parts inheritance and intervention.
In "Mickey's Strange Mission [Chapter Two]," Mickey, Goofy, and the reluctant Blackstone P. Percival navigate a treacherous, trap-laden canyon while tracking down Black Pete. With a wary old miner guarding his gold and suspicious of outsiders, Mickey must outwit the booby-trapped terrain and the miner’s stubborn distrust—before Pete’s inheritance hangs in the balance.
In "Mickey's Strange Mission [Chapter Three]," Mickey tracks down Pete just as he's about to steal a miner's gold, only to learn the treasure is actually Pete’s long-lost inheritance—conditional on a full year of honest living. With the stakes clear, Pete tentatively steps into a life of reform, but can he truly stay on the straight and narrow for the next 366 days?
When the Rover Rogue Boys find their moonlit heists ruined by the full moon’s glare, they force Gyro Gearloose to invent a dye that can blot out the Moon’s light—setting off a wild, wobbly scheme that turns the night sky into a canvas of chaos.
In "The Moon-Blot Plot [Chapter Two]," Mickey, Goofy, and Gyro race against time in a homemade rocket to intercept the Rover Rogue Boys, who’ve stolen a moon-bound ship and are heading for the Moon with a dangerous black dye. With Gyro at the controls, the trio maneuvers through an asteroid field, using the rocky debris as cover in a high-stakes effort to stop the villains from blotting the lunar surface.
Mickey and the gang race against time through an asteroid-strewn void, using clever delays to stay ahead of the Rover Rogue Boys. With the Moon within reach, they spring a trap, hoping to outwit the fast-approaching crooks—though the real test is just beginning.
ComicBooks.com Value
Find on ebay
Where to buy
Read it digitally
Sell my copy
Have this issue — or a whole collection? Get a fair offer from us, skip the marketplace fees and the hassle.
We Buy Collections ▸Full credits
Reprints
↩ Reprints Walt Disney's Comics and Stories #1 (217) (1958), Walt Disney's Comics and Stories #2 (218) (1958), Walt Disney's Comics and Stories #3 (219) (1958), Walt Disney's Comics and Stories #4 (220) (1959), Walt Disney's Comics and Stories #5 (221) (1959), Walt Disney's Comics and Stories #6 (222) (1959), Walt Disney's Comics and Stories #7 (223) (1959), Walt Disney's Comics and Stories #8 (224) (1959), Walt Disney's Comics and Stories #9 (225) (1959), Walt Disney's Comics and Stories #10 (226) (1959), Walt Disney's Comics and Stories #11 (227) (1959), Walt Disney's Comics and Stories #12 (228) (1959), Walt Disney's Comics and Stories #6 (234) (1960), Walt Disney's Comics and Stories #7 (235) (1960), Walt Disney's Comics and Stories #8 (236) (1960), Walt Disney's Comics and Stories #2 (242) (1960), Walt Disney's Comics and Stories #3 (243) (1960), Walt Disney's Comics and Stories #4 (244) (1961), Walt Disney's Comics and Stories #5 (245) (1961), Walt Disney's Mickey Mouse #76 (1961), Walt Disney's Comics and Stories #6 (246) (1961), Walt Disney's Comics and Stories #7 (247) (1961), Walt Disney's Comics and Stories #8 (248) (1961)
Reviews
Reader reviews
No reader reviews yet.