
Legends of the Dark Knight: Jim Aparo #2
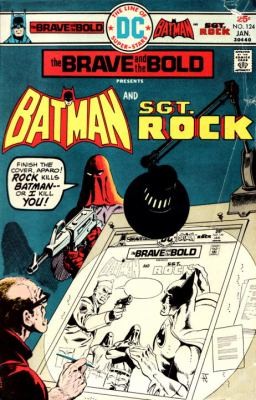
☆ Be the first to review + Add to your collection — Join freeIn "How to Make a Super-Hero," Sgt. Rock goes on a high-stakes mission to recover stolen M-76 rifles, teaming up with Batman in a gritty, no-nonsense pursuit. Written by Bob Haney and brought to life with dynamic art by Jim Aparo—whose pencils, inks, and lettering all contribute to the story's sharp, authentic feel—this issue blends military precision with noir intrigue, all framed by Aparo’s iconic cover.
In "Small War of the Super Rifles," Sgt. Rock goes on the hunt after a high-tech military rifle shipment vanishes, forcing him to join forces with Batman in a tense pursuit across shadowed urban landscapes. Written by Bob Haney and Murray Boltinoff, with art by Jim Aparo, the story blends gritty wartime tension with the sharp detective work of Gotham’s Dark Knight.
In this gripping tale from *Legends of the Dark Knight: Jim Aparo #2*, Batman’s path crosses with a mysterious figure known only as Dragon when a chance encounter with a homeless man leads to a shocking inheritance. As Batman and Dragon team up to track down The Stylist, a deadly contract killer with a penchant for precision, the line between past and present blurs in a hunt that tests loyalty and legacy.
In "Deathmask!", Batman confronts a supernatural force tied to the ancient Xochipecs' god of death after a mysterious deathmask from their lost tribe surfaces at the Gotham Museum. As the city's shadows grow heavier, he must face a power that defies reason—before the mask's dark legacy consumes Gotham.
In "A Monster Walks Wayne Manor!", Batman confronts a relentless Swiss scientist at the abandoned Wayne Manor, where the man’s obsession with studying Ubu—Ra's al Ghul’s twisted enforcer—threatens to unleash something far beyond his control. With the mansion’s shadows alive with secrets and the line between science and madness blurring, Batman must outthink a mind driven by curiosity and desperation.
ComicBooks.com Value
More listings for this title
Where to buy
Read it digitally
Sell my copy
Have this issue — or a whole collection? Get a fair offer from us, skip the marketplace fees and the hassle.
We Buy Collections ▸Full credits
Reprints
↩ Reprints Detective Comics #437 (1973), Detective Comics #438 (1973), The Brave and the Bold #123 (1975), The Brave and the Bold #124 (1976), The Brave and the Bold #125 (1976), The Brave and the Bold #126 (1976), The Brave and the Bold #127 (1976), The Brave and the Bold #128 (1976), The Brave and the Bold #129 (1976), The Brave and the Bold #130 (1976), The Brave and the Bold #131 (1976), The Brave and the Bold #132 (1977), The Brave and the Bold #133 (1977), The Brave and the Bold #134 (1977), The Brave and the Bold #135 (1977), The Brave and the Bold #136 (1977), The Brave and the Bold #138 (1977), The Brave and the Bold #139 (1978), The Brave and the Bold #140 (1978), The Brave and the Bold #141 (1978), The Brave and the Bold #142 (1978), The Brave and the Bold #143 (1978), The Brave and the Bold #144 (1978), The Brave and the Bold #145 (1978), The Brave and the Bold #147 (1979), The Brave and the Bold #148 (1979), The Brave and the Bold #149 (1979), The Brave and the Bold #150 (1979), The Brave and the Bold #151 (1979)
Reviews
Reader reviews
No reader reviews yet.